



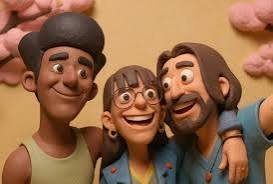
A photograph freezes a single instant, but audiences increasingly expect motion. That gap between the images we already own and the video our channels demand is where a new kind of tool comes in. With image to video technology, a static picture becomes a short animated clip, adding movement, depth, and life to something that used to sit still. For anyone with an archive of photos and a need to post video, this quietly changes the value of every image on their drive. This article explains how the transformation works, who benefits, and the practical steps to turn a favorite still into a clip worth sharing. If you have great photos but no video, the raw material for your next post may already exist.
How a Photo Starts Moving
The core idea is motion synthesis. The tool analyzes a still image, identifies its elements, and generates plausible movement, drifting clouds, a subtle camera push, a gentle sway, so the frame comes alive. You are not filming anything new; you are extending what the photo already implies into a few seconds of motion. The source image sets the scene, and the tool animates within it.
This differs sharply from generating video from scratch. Because the starting point is a real image you chose, you keep full control over composition and subject. The result feels grounded in your original photo rather than invented wholesale, which is why the technique suits creators who care about a specific look.
Types of Motion You Can Add
Movement generally falls into two families. The first is camera motion: slow zooms, pans, and parallax that create a sense of depth as if a camera were gliding through the scene. The second is subject motion, where elements within the frame move, water ripples, hair shifts, light flickers. Choosing the right family for a given photo is the single biggest factor in whether the result feels natural.
A landscape often shines with a slow camera push that reveals depth, while a portrait may only need the faintest movement to avoid feeling eerie. Matching the motion to the subject keeps the clip believable. Overdoing it is the fastest way to make an otherwise beautiful image look artificial.
Who Finds This Useful
Photographers and visual artists gain a new way to present their work. A striking still can be turned into a short animated piece for social feeds that reward video, letting the image reach audiences who would scroll past a static post. The original photo keeps its integrity while gaining the motion the platform favors.
Small businesses and marketers benefit too. Product photos, which most brands already have in abundance, can become short motion clips for ads and listings without a new photo shoot. Adding subtle movement to a product shot draws the eye and lifts engagement, stretching existing assets into fresh content at almost no extra cost.
Solving an Everyday Problem
The recurring need is simple: people have images but need video, and reshooting everything as motion is impractical. Converting stills bridges that gap directly, unlocking a back catalog of photos as a source of video content. A creator with hundreds of images suddenly has hundreds of potential clips. Tools such as Pippit AI are built to make this conversion quick, so turning an archive into shareable video takes minutes rather than a production day.
Expectations still need managing. Complex motion, like a person turning fully around, is beyond what a single flat image supports, since the tool has no information about the hidden side. Choosing photos whose implied motion is simple keeps results clean and avoids the distortions that come from asking for movement the source cannot justify.
Turning a Still Into a Clip
Start by choosing the right photo. Images with clear depth, a foreground and a distant background, animate more convincingly than flat, busy compositions. A well-chosen source does half the work, so it is worth browsing your library for shots that already suggest movement rather than forcing motion onto an unsuitable frame.
Then pick a single, subtle motion and generate a short clip. Review it at full speed and ask whether the movement enhances the image or distracts from it. If it feels too much, reduce the intensity and try again. Once the motion sits right, add gentle background sound and a clean transition so the few seconds feel intentional and finished rather than like a looping trick.
Keeping It Believable
Restraint is the guiding principle. The best photo-to-video clips often use motion so subtle that a viewer feels it more than notices it. When movement calls attention to itself, the illusion breaks and the clip reads as a gimmick. Aim for the amount of motion that would exist if the moment had simply continued a second longer, and stop there.
Mistakes to Watch For
The most common mistake is applying heavy motion to every image regardless of subject. A calm portrait does not need a dramatic zoom, and forcing one produces warping around faces and edges. Let the photo dictate the motion rather than applying a single effect everywhere. Judgment about restraint matters more than any setting.
Another error is ignoring the source quality. A low-resolution or blurry photo animates into an even messier clip, since the tool amplifies whatever it starts with. Begin with the sharpest version of your image available. Clean input is the foundation of a clean result, and no amount of motion can rescue a weak original.
Giving Your Photos a Second Life
Every still image holds an implied moment, and the ability to extend that moment into motion turns a static library into a well of video content. The technique rewards restraint and good source selection far more than aggressive effects: choose a photo with real depth, add just enough movement to feel alive, and finish it with sound and a clean edit. For photographers, marketers, and anyone sitting on a folder of unused images, this is a practical way to meet the demand for video without a camera or a shoot. Pick one favorite photo, add a single gentle motion, and watch it come to life. The content you need may have been on your drive all along.